slug
tags
password
icon
lang
date
category
type
status
summary
This post describes using Microsoft Word and Excel to generate conference name badges quickly. It is motivated by the blog.
{/* truncate */}
Preparation
In the first step, you need to have three files in your hand:
- Background image: Photoshop-designed background
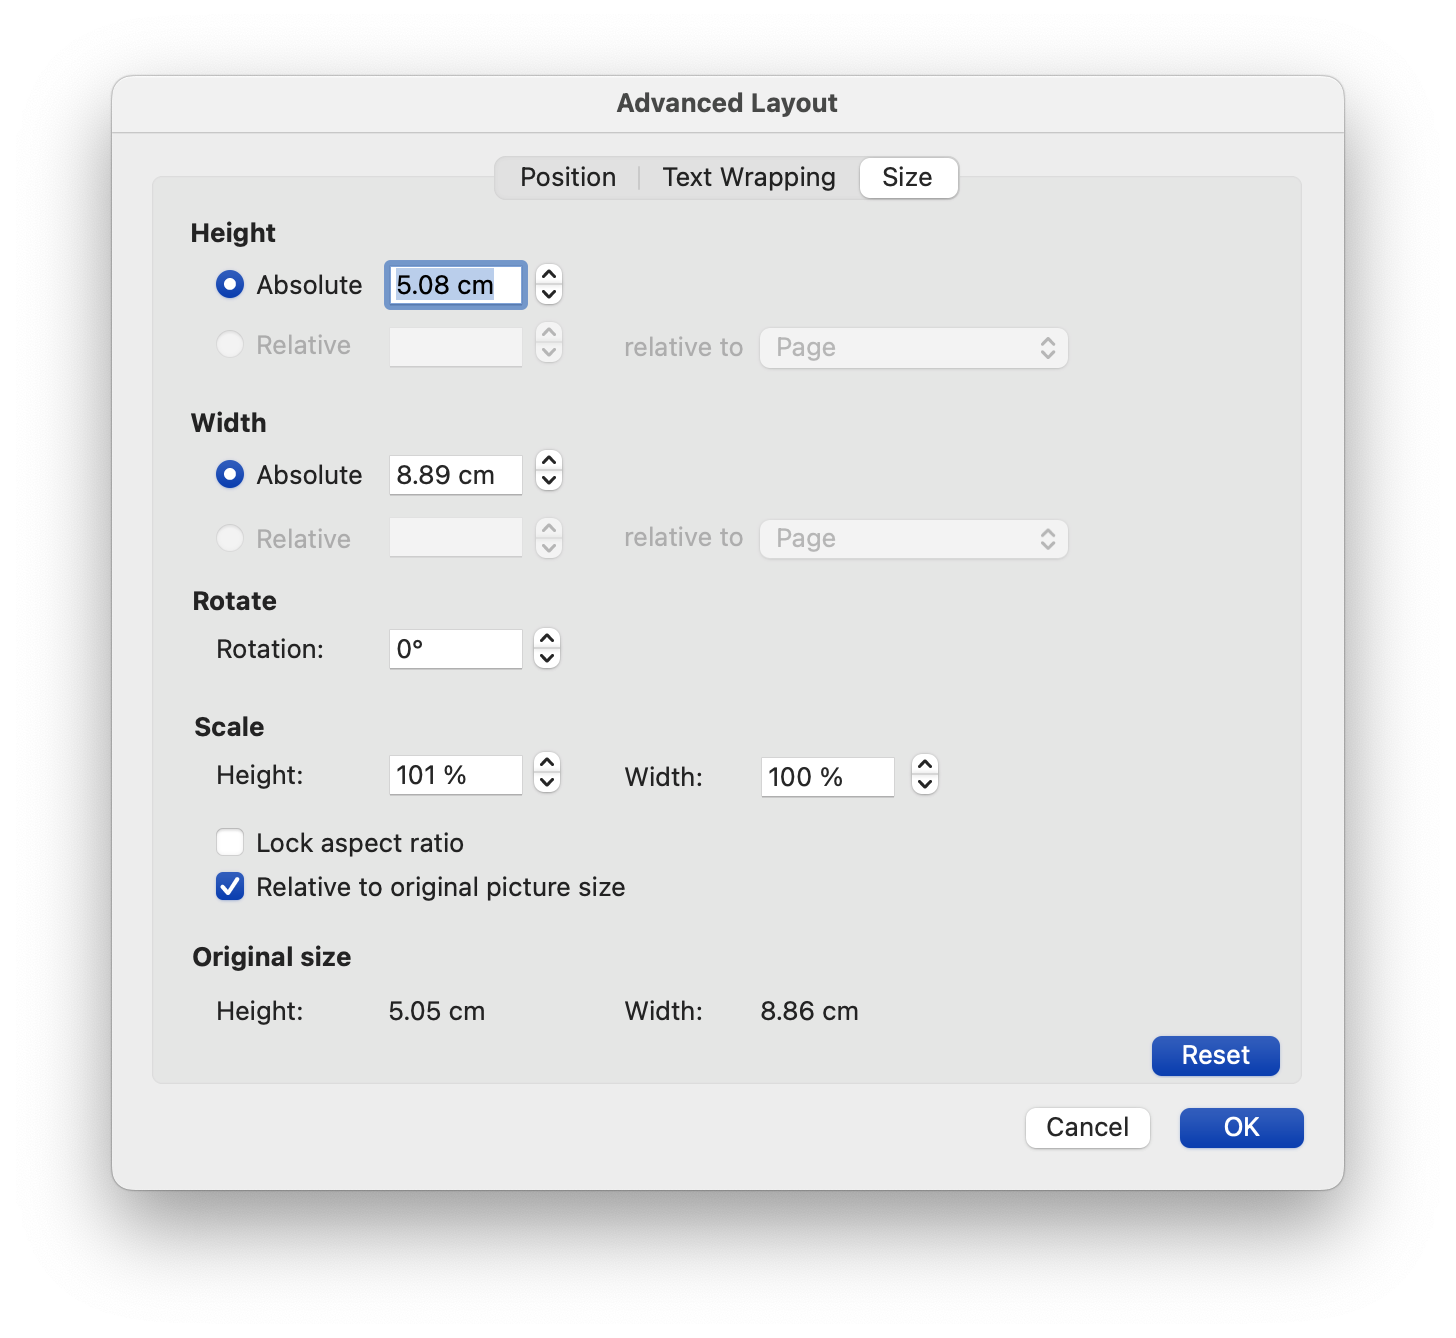
.pngor.jpegimage with all conference information that you would like to include except the attendee's name and affiliation. You can design your own image size, but a preferred size isheight 5.08cm x width 8.89cm.
- Attendee list (Excel): a
.xlsxfile with all attendees' details.
- Name badges (Word): a
.docxfile with the template of name badges.
Create the template of name badges
Create the
.docx file with Layout -> Margins -> Custom Margins and set the margins with the below values:Create
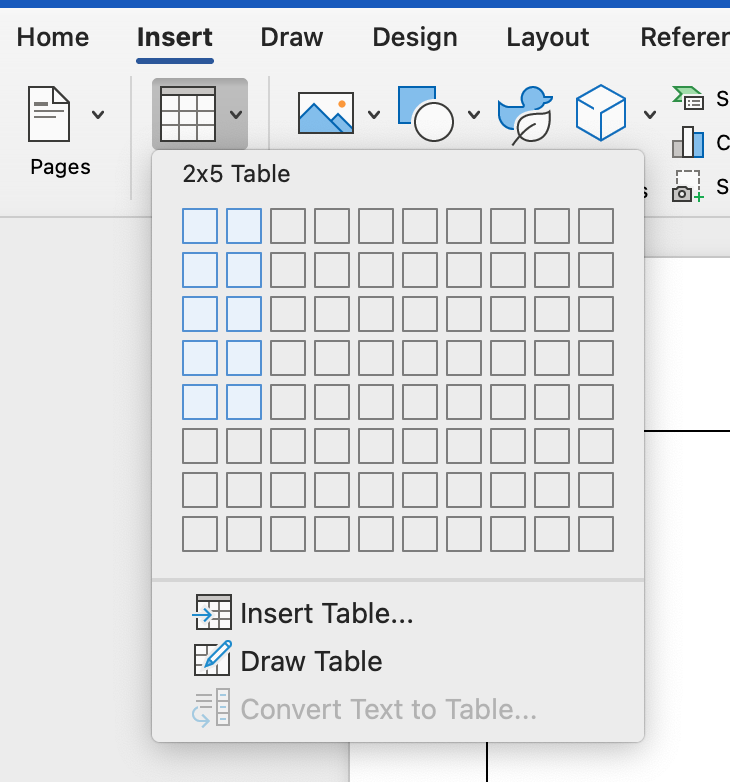
2*5 blank tables:
And resize the
Layout -> Height and Width to height 5.08cm x width 8.89cm to ensure each page will include ten badges.
Insert the background image into the first cell and set
Wrap Text -> Behind Textthe Size and Position of the image as:
Then match the background image with the cell border. Choose suitable font position (Centre Text with 1.5 Line Spacing) and font size for name and affiliation.
Create the name badges
- Select
Mailings -> Select Recipients -> Use an existing listand select theAttendee listin a specific directory.
Insert Merge Fieldand set the<<Name>>. In the second line, select the<<Affiliation>>filed.
- Copy all content in the first cell, including the background image and paste it into the second cell.
- In the second cell, add rules to let the Word generate the second attendee name badge with
Mailings -> Rules -> Next Record, and it will be like:
- Copy the second cell for all the rest cells.
- Preview and
Mailings -> Finish & Merge -> Edit Individual Document.
- Author:PENG Jiaxin
- URL:https://www.pengjiaxin.com/article/namebadges
- Copyright:All articles in this blog, except for special statements, adopt BY-NC-SA agreement. Please indicate the source!